Displaying items by tag: upgrade
Installation procedure
jBackend basic extension has just one package to download and install. The package includes the component and three plugins (User Module, Content Module, and Push Module), and support the installation with "upgrade" mode, so there’s no need to uninstall any previous installed version.
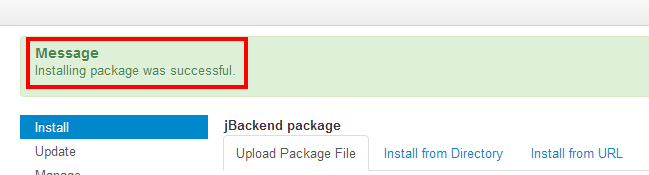
To install jBackend, login to Joomla backend as administrator, and go to menu "Extension Manager". Click the browse button, select the package file (jBackendX.X_J3.zip) and click the installation button.

The package will be uploaded on the server and then installed. After installation finished a message will report a successful message.
That’s all. Now we are ready to start using jBackend.
Upgrade procedure
When upgrading from a previous version of jBackend, there is no need to first uninstall the old package. As mentioned earlier, jBackend supports the "upgrade" mode for the installation, so is enough to just install the new package over the old one. The component and the three plugins included in the basic package will be upgraded.
Note that during the upgrade also the database tables are upgraded when needed, but without to delete or loose any table data. It is in charge of the installation process to upgrade tables structure if needed. All the data (e.g. API Keys) will be preserved.
Installation procedure
Tag Meta extension has just one package to download and install. The package includes a component and a system plugin, and supports the installation with "upgrade" mode, so there's no need to uninstall any previous version of Tag Meta.
To install Tag Meta, login to Joomla backend as administrator, and go to menu "Extensions manager". Click the browse button, select the package file (TagMetaX.XCommunity.zip or TagMetaX.XEnterprise.zip) and click the installation button.

That’s all. Now we are ready to start using Tag Meta.
Upgrade procedure
When upgrading from a previous version of Tag Meta, there is no need to first uninstall the old package. As mentioned earlier, Tag Meta supports the "upgrade" mode for the installation, so it is enough to just install the new package over the old one, both component and plugin will be upgraded.
Note that during the upgrade also the database tables are upgraded when needed, but without to delete or loose any table data. It is in charge of the installation process to upgrade tables structure as needed. All the rules will be preserved.
Installation procedure
ReDJ extension has just one package to download and install. The package includes a component and a plugin, and supports the installation with "upgrade" mode, so there’s no need any more to uninstall any previous version of ReDJ.
To install ReDJ, login to Joomla backend as administrator, and go to menu "Extensions manager". Click the browse button, select the package file (ReDJX.XCommunity.zip or ReDJX.XEnterprise.zip) and click the installation button.

That’s all. Now we are ready to start using ReDJ.
Upgrade procedure
When upgrading from a previous version of ReDJ, there is no need to first uninstall the old package. As mentioned earlier, ReDJ supports the "upgrade" mode for the installation, so it is enough to just install the new package over the old one, both component and plugin will be upgraded.
Note that during the upgrade also the database tables are upgraded when needed, but without to delete or loose any table data. It is in charge of the installation process to upgrade tables structure as needed. All the rules will be preserved.