Displaying items by tag: plugin settings
Initial configuration
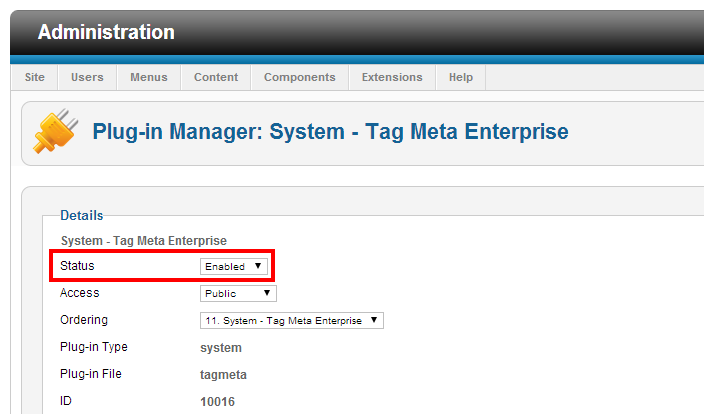
The first thing to do is to enable Tag Meta plugin. To enable the plugin go to menu "Extensions" -> "Plug-in Manager", find a system type plugin named "System - Tag Meta Community" or "System - Tag Meta Enterprise" in the plugin list, and click on it to access to plugin settings. Set "Status" to “Enabled”, and set other parameters on the right side according to your needs. Look at "Plugin settings" paragraph for detailed information about each parameter. Click on "Save & Close" button and check that the plugin is now enabled.

Remember that is the plugin that "does the work". The Tag Meta component is just the administrative interface for managing meta rules an other features, but is the plugin that checks site requests and performs meta enhancement when needed. So, the very first thing to do is to enable the plugin. Note that if you need to disable Tag Meta, just disable the plugin.
Another thing to check is the plugins order that can be very important, especially if there are some other plugins that mess with page's meta information. In most cases it is better to set Tag Meta as the last system plugin, so it will be the last to be executed and to madofy page content. Now Tag Meta is ready to work! You can now create your first meta rule, and test the result through the web browser. Be careful that you could get a cached page. To avoid this just clear server-side cache from backend (menu "Maintenance" -> "Clean Cache"), and client-side cache from your web browser.
Initial configuration
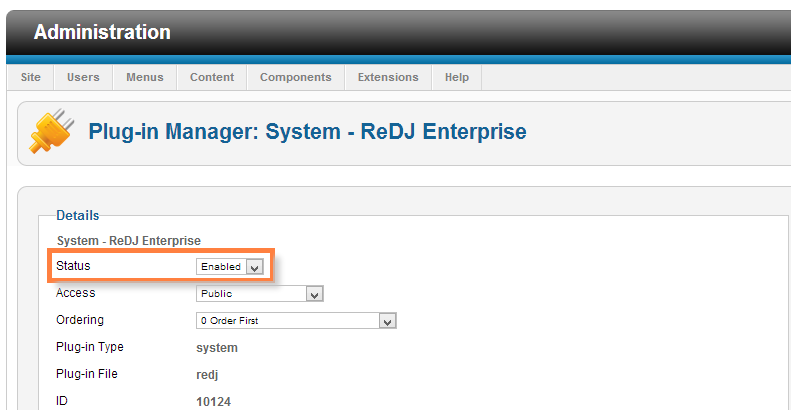
The first thing to do is to enable ReDJ plugin. To enable the plugin go to menu "Extensions" -> "Plug-in Manager", find a system type plugin named "System - ReDJ Community" or "System - ReDJ Enterprise" in the plugin list, and click on it to access to plugin settings. Set "Status" to “Enabled”, and set other parameters on the right side according to your needs. Look at "Plugin settings" paragraph for detailed information about each parameter. Click on "Save & Close" button and check that the plugin is now enabled.

Remember that is the plugin that "does the work". The ReDJ component is just the administrative interface for managing redirection rules an other features, but is the plugin that checks site requests and performs redirection and other actions when needed. So, the very first thing to do is to enable the plugin. Note that if you need to disable ReDJ, just disable the plugin.
Another thing to check is the plugins order that can be very important, especially if there are some other plugins that mess with the source URL, redirection and aliases. In most cases it is better to set ReDJ as the first system plugin, so it will be the first to be executed and to check any page call. Now ReDJ is ready to work! You can now create your first redirection rule, and test the redirection through the web browser. Be careful that you could get a cached page. To avoid this just clear server-side cache from backend (menu "Maintenance" -> "Clean Cache"), and client-side cache from your web browser.
The ErrorDocument directive
Some non-existing URLs are managed directly by Apache that returns the 404 error page.

To manage these URLs with ReDJ and make redirection it is necessary to tell to Apache to pass 404 errors to Joomla (and ReDJ). To do this, it is enough to append this directive at the end of Joomla standard .htaccess file:
ErrorDocument 404 /
